Getting started with E2E Testing using NUnit and Microsoft Playwright

In this tutorial style article I'll cover the process of setting up a .NET 7 project and perform E2E (end-to-end) testing using NUnit and Microsoft Playwright.
NUnit is an open-source testing framework for .NET and Microsoft Playwright is a library that enables automated browser testing. These tools can work together to allow you to perform E2E testing of your web applications.
Step 1: Create a .NET 7 NUnit Test Project
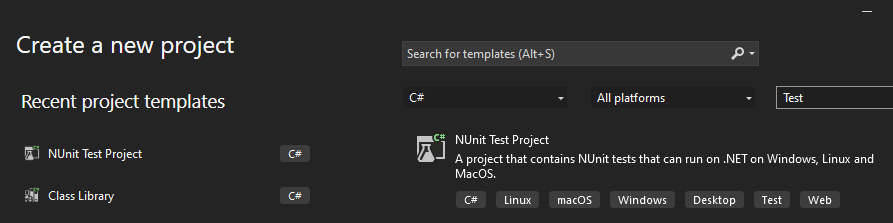
To get started, you will need to create a new .NET 7 project. You can do this using the Visual Studio UI and make sure you select the NUnit Test Project template which comes pre-configured with NUnit and necessary runners.
Step 2: Write your first test
Now that you have NUnit installed, you can start writing tests. You can write your first test by creating a new class and then you can write individual test methods and decorate them with the [Test] attribute. Here's an example of a simple test case:
using NUnit.Framework;

public class MyTests
{
    [Test]
    public void Test1()
    {
        Assert.AreEqual(1, 1);
    }
}
Step 3: Install Microsoft.Playwright
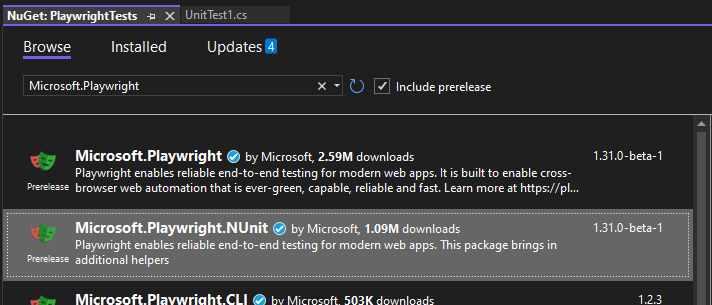
To use Microsoft Playwright, you need to install this package from NuGet. You can do this by running the following commands in the terminal: dotnet add package Microsoft.Playwright.NUnit or use the NuGet Package Manager UI.
Step 4: Using Microsoft Playwright
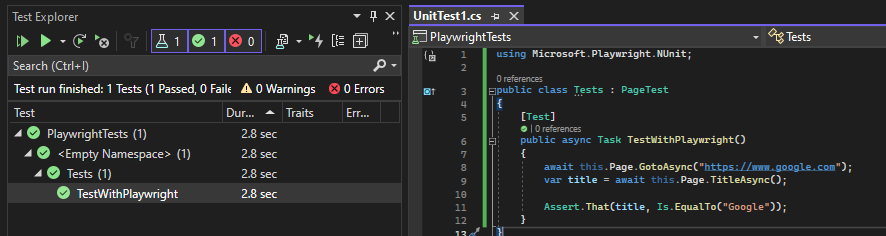
In this example we write a test that launches the browser and navigates to google.com and then verifies that the page title is Google.
using NUnit.Framework;
using Microsoft.Playwright.NUnit;

public class Tests : PageTest
{
    [Test]
    public async Task TestWithPlaywright()
    {
        await this.Page.GotoAsync("https://www.google.com");
        var title = await this.Page.TitleAsync();

        Assert.That(title, Is.EqualTo("Google"));
    }
}
Step 5: Install a Playwright Browser
If this is your first time running Playwright (which I'm assuming since you're readning this) then you will get this message as soon as you try to run your test for the first timne.
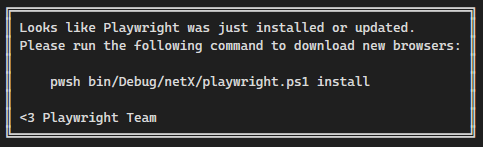
Run the suggested command in Powershell, and since you are using a .NET 7 project this will look something like this:

Once this installation has completed you can go back to Visual Studio and re-run your test and everything should pass as expected:
Step 6: Let the fun begin! 🥳
Now when you have a the basics setup you can start exploring the various features withing Microsoft Playwright and start performing assertions on various DOM elements (or such). Let you imagination run free! A good place to start could be this related blog post:
Wrapping up!
In this tutorial style article we covered how to get started with NUnit and Microsoft Playwright in a .NET 7 project. With these tools, you can write automated tests that run in a real browser, allowing you to perform end-to-end testing of your web applications.